As of writing, on Aviatrix Controller version 7.1.2131 and CoPilot v4.3.1, the current process of installing a certificate:
- For Aviatrix Controller
- By default, the Aviatrix Controller uses a self-signed certificate. In this case, an option to generate a Certificate Signing Request (CSR) will be available. The CSR requires the Fully Qualified Domain Name (FQDN) of the controller, e.g., avx-controller.mycompany.com. When the CSR is generated, the controller will also generate and store a corresponding private key. The generated CSR is supplied to the Certificate Authority (CA) which will return a signed public certificate. In addition to this certificate, a CA certificate (generally publicly available from the CA) will also be required during the import process.
- If a public certificate is already installed, you can no longer generate a CSR without first reverting to a self-signed certificate.
- There is also an option to import an externally generated private key with corresponding public and CA certs.
- For Aviatrix CoPilot
- The Copilot does not support the generation of CSR’s. Instead, an externally generated private key and corresponding CA-signed public key are required for importation.
The processes above can be challenging for customers, especially when renewing existing certificates. This confusion is compounded by the variety of different certificate types of Certification Authorities, certificate formats and operating system tools.
This blog intends to create a more standardized process for Aviatrix Customers to follow.
OpenSSL
- To standardize the process of requesting a certificate, we will use a utility called OpenSSL
- OpenSSL is included in all major Linux distributions as well as all versions of MacOS.
- For Windows, there is a list of 3rd party maintained binaries on https://wiki.openssl.org/index.php/Binaries. For the examples below I’m using Windows 10 with Win32OpenSSL installed.
Quick Win32OpenSSL install guide
When downloading Win32 OpenSSL make sure to choose the binary matching your OS architecture.
Please note: Do not select the *light* edition as it is missing openssl.cfg file.
The following examples assume a default installation of OpenSSL in C:\Program Files\OpenSSL-Win64
Make sure system environment variables include a new variable name: OPENSSL_CONF
Value with a value of “C:\Program Files\OpenSSL-Win64\bin\openssl.cfg”
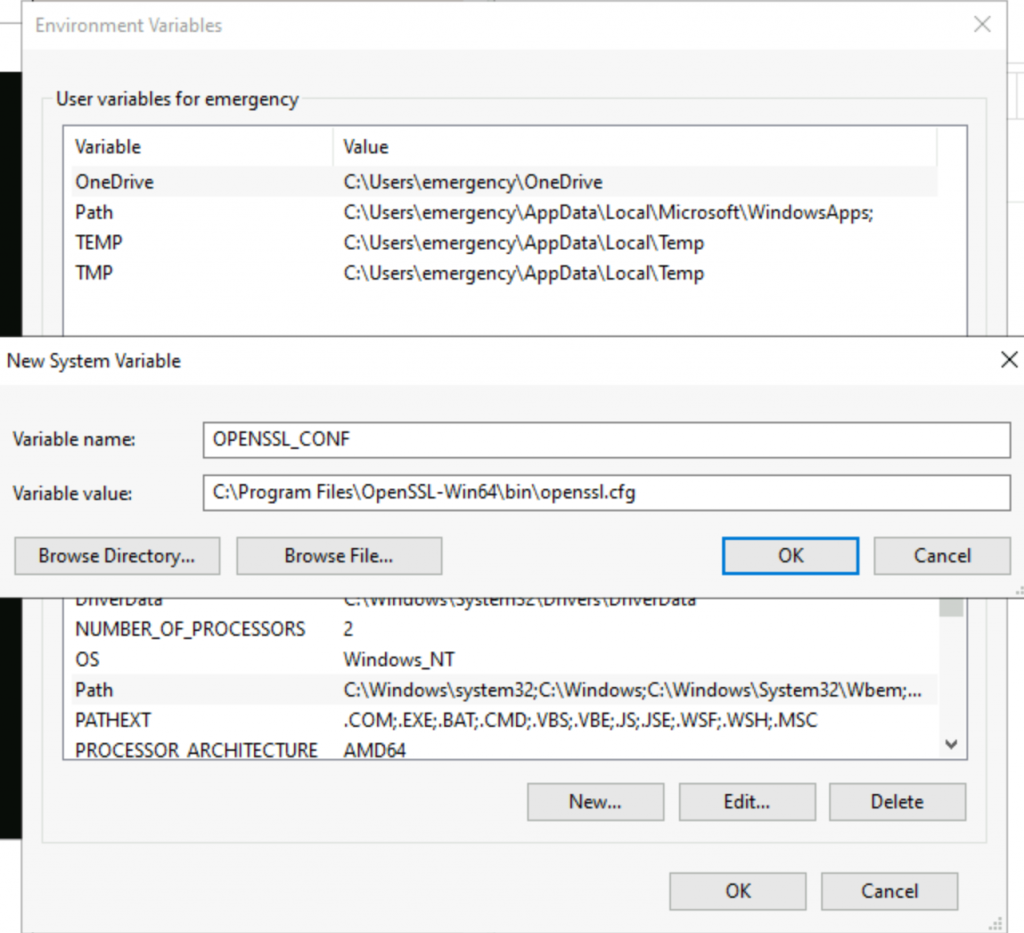
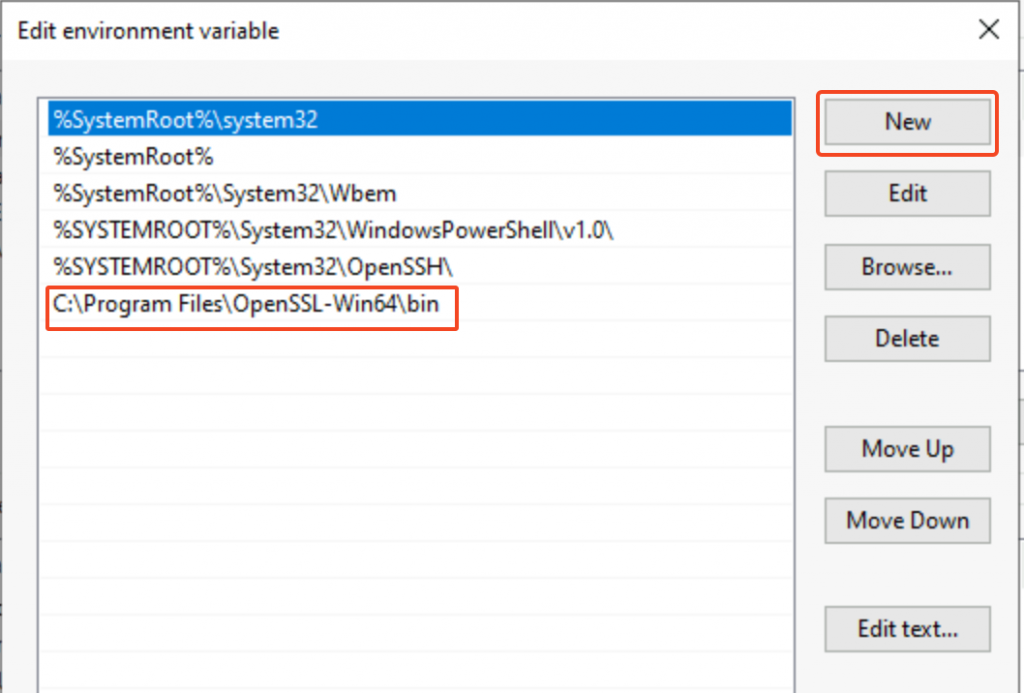
Make sure system environment variable Path includes C:\Program Files\OpenSSL-Win64\bin
Restart Windows for the system variables to take effect.
NOTE: Microsoft Visual C++ 2015-2019 Redistributable must be installed for Win32OpenSSL to work.
Certificate types
Both Aviatrix Controller and CoPilot is looking for PEM encoded X.509 certificate
When a certificate with public key is opened in a text editor, it will look like following:
-----BEGIN CERTIFICATE-----

MIIGhz...

...

...WlLw==

-----END CERTIFICATE-----
When a PEM encoded RSA private key is opened in a text editor, it will look like following:
-----BEGIN RSA PRIVATE KEY-----

MIIE...

...

...

-----END RSA PRIVATE KEY-----
NOTE: Any other encodings (DER, P7B/PKCS#7 or PFX/PKCS#12) are not supported but can be converted to PEM format by OpenSSL. Please see https://aboutssl.org/convert-certificate-to-pem-crt-to-pem-crt-to-pem-der-to-pem/ for instructions.
Important! The private key cannot have a password on it.
If the private key has a password, use the following command to create a new key file without a password:
- Run this command: openssl rsa -in [original.key] -out [new.key]
- Enter the passphrase for the original key when asked.
- The output file [new.key] should now be unencrypted.
The process summarized
- Use OpenSSL to generate a private key.
- Use OpenSSL to generate a CSR from that private key.
- Submit CSR to your CA.
- Your CA will issue a signed server certificate. In addition, a signed intermediate CA certificate should be obtained.
- Install signed CA certificate, signed server certificate and private key on Controller/CoPilot
Use OpenSSL to generate a private key
The following command is used to generate a 4096 bit RSA private key, outputting it to a file named “privatekey.pem”:
openssl genpkey -algorithm RSA -out privatekey.pem -pkeyopt rsa_keygen_bits:4096- openssl: This is the command line tool for the OpenSSL binary.
- genpkey: This is the OpenSSL command for generating a private key.
- -algorithm RSA: This switch determines the algorithm to use for the key generation. In this case, RSA is specified.
- -out privatekey.pem: The -out switch specifies the output filename. Here, the output of the command (the newly generated private key) is saved to a file named privatekey.pem.
- -pkeyopt rsa_keygen_bits:4096: The -pkeyopt option allows for setting public key parameters. In this example, rsa_keygen_bits:4096 specifies that the RSA key to be generated should have a length of 4096 bits.
To verify the consistency of a private key, use following command to check that the mathematical structure of the key is sound:
openssl rsa -in privateKey.pem -check -noout- rsa: This OpenSSL command handles RSA keys. Operations include generation, examination, and in some cases, private key decryption.
- -in privateKey.pem: The -in option specifies the input filename. Here, the private key used for the operation is read from a file named ‘privateKey.pem’.
- -check: This option checks the consistency of an RSA private key.
- -noout: This prevents the key from being printed to the console. As such, only the result of the check will be written to stdout.
Use OpenSSL to generate CSR
Use the following command to generate a CSR using the private key (privateKey.pem) created earlier. You’ll be prompted to enter the details for the CSR, including your Common Name (domain name), organization name, and more. If you wish to automate this process, you can use -subj flag to provide the CSR information.
openssl req -new -key privatekey.pem -out request.csr- req: This OpenSSL command is for handling CSR (PKCS#10 X.509 Certificate Signing Request (CSR) management).
- -new: This option generates a new CSR.
- -key privatekey.pem: This specifies the file to read the private key from, in this case “privatekey.pem”.
- -out request.csr: This specifies the output filename. Here, the CSR is written to a file named “request.csr”.
Example of the prompt, it’s critical to enter the server FQDN to match your intended URL to access the servers, e.g., avxctrl.cloudlearning365.com in the following example:
You are about to be asked to enter information that will be incorporated

into your certificate request.

What you are about to enter is what is called a Distinguished Name or a DN.

There are quite a few fields but you can leave some blank

For some fields there will be a default value,

If you enter '.', the field will be left blank.

-----

Country Name (2 letter code) [AU]:CA

State or Province Name (full name) [Some-State]:Ontario

Locality Name (eg, city) []:Toronto

Organization Name (eg, company) [Internet Widgits Pty Ltd]:Aviatrix

Organizational Unit Name (eg, section) []:IT

Common Name (e.g. server FQDN or YOUR name) []:avxctrl.cloudlearning365.com

Email Address []:

Please enter the following 'extra' attributes

to be sent with your certificate request

A challenge password []:

An optional company name []:
To validate the CSR file, use the following command:
openssl req -text -noout -verify -in request.csr- req: This OpenSSL command deals with Certificate Signing Requests (CSRs).
- -text: Outputs the CSR information in a text-based, human-readable format.
- -noout: Prevents output of the encoded version of the CSR request.
- -verify: Checks the signature on the CSR to verify its integrity.
- -in request.csr: This specifies the filename to read the CSR from. Here, ‘request.csr’ is the input CSR file.
Submit CSR to your Certificate Authority
I’ve summited the CSR to ZeroSSL and obtained a ZIP file containing: ca_bundle.crt and certificate.crt.
Use following command to explore the certificate:
openssl x509 -in certificate.crt -text -noout | grep -E '(Subject|Issuer):'

Issuer: C = AT, O = ZeroSSL, CN = ZeroSSL RSA Domain Secure Site CA
Subject: CN = avxctrl.cloudlearning365.com
Now use the similar command on ca_bundle.crt to explore the certificate:
openssl x509 -in ca_bundle.crt -text -noout | grep -E '(Subject|Issuer):'

Issuer: C = US, ST = New Jersey, L = Jersey City, O = The USERTRUST Network, CN = USERTrust RSA Certification Authority
Subject: C = AT, O = ZeroSSL, CN = ZeroSSL RSA Domain Secure Site CA
Notice how the subject of ca_bundle.crt matches issuer of certificate.crt. This means ca_budle.crt is the intermediate CA that issued the certificate for avxctrl.cloudlearning365.com
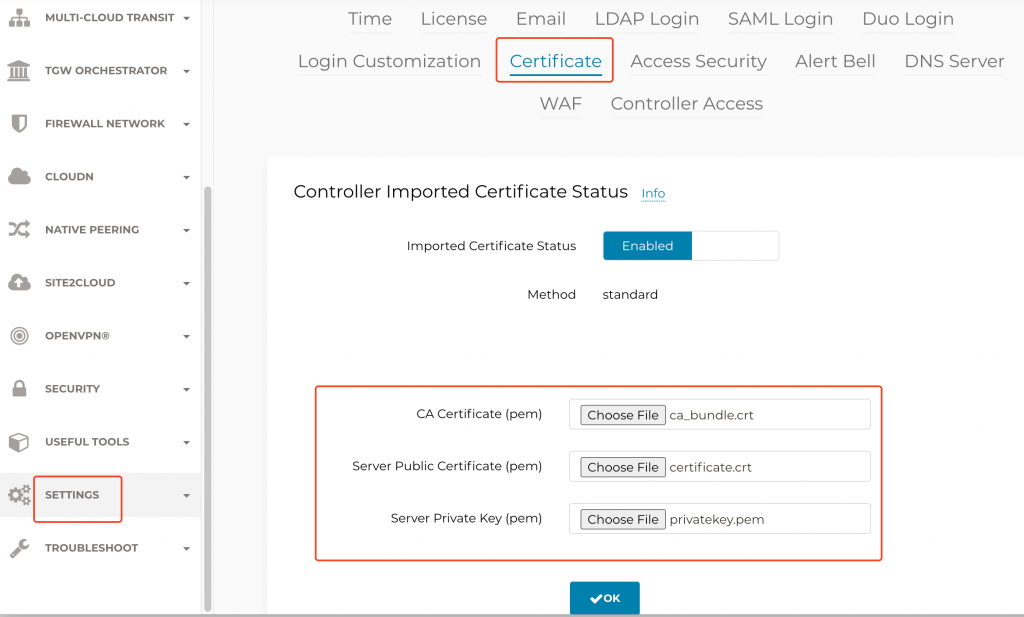
Install Aviatrix Controller Certificate
Aviatrix Controller -> Settings -> Certificate
When Aviatrix Controller is using self-signed certificate:
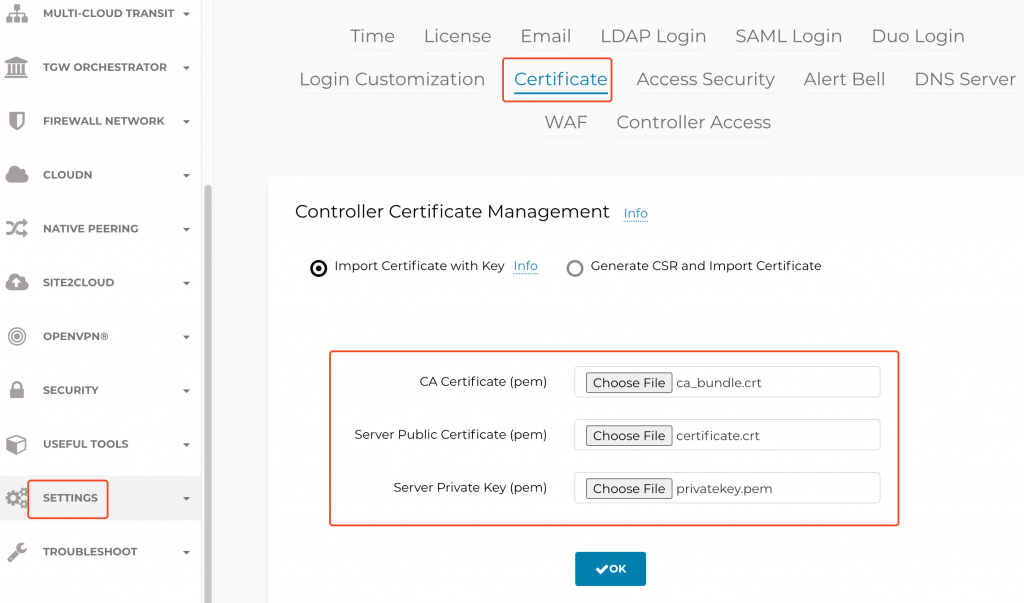
When Aviatrix already has a certificate installed, and you are renewing the certificate:
CoPilot SSL certificate installation
CoPilot -> Settings -> Configuration -> General -> CoPilot Certificates
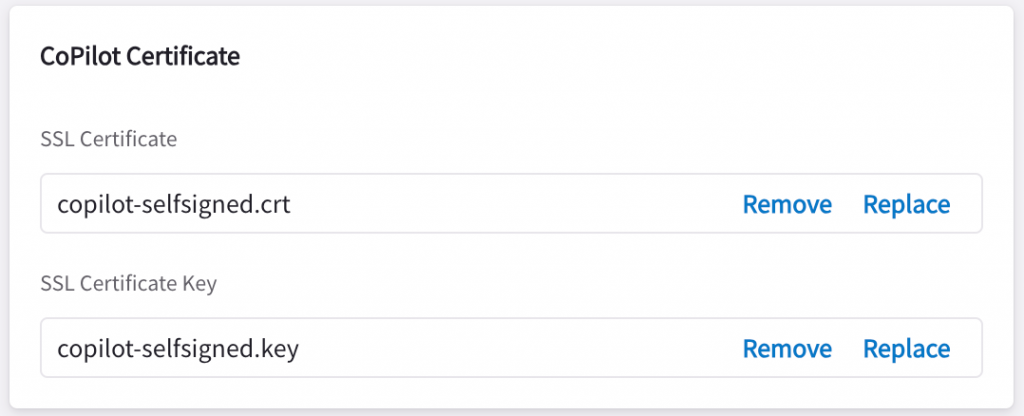
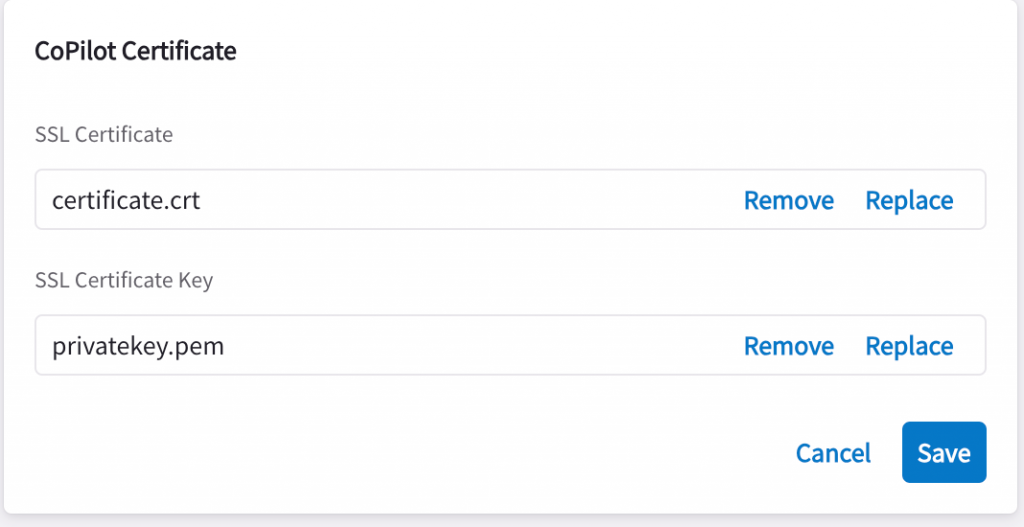
Replace SSL Certificate with the server certificate, and SSL Certificate Key with the private key, then click on Save
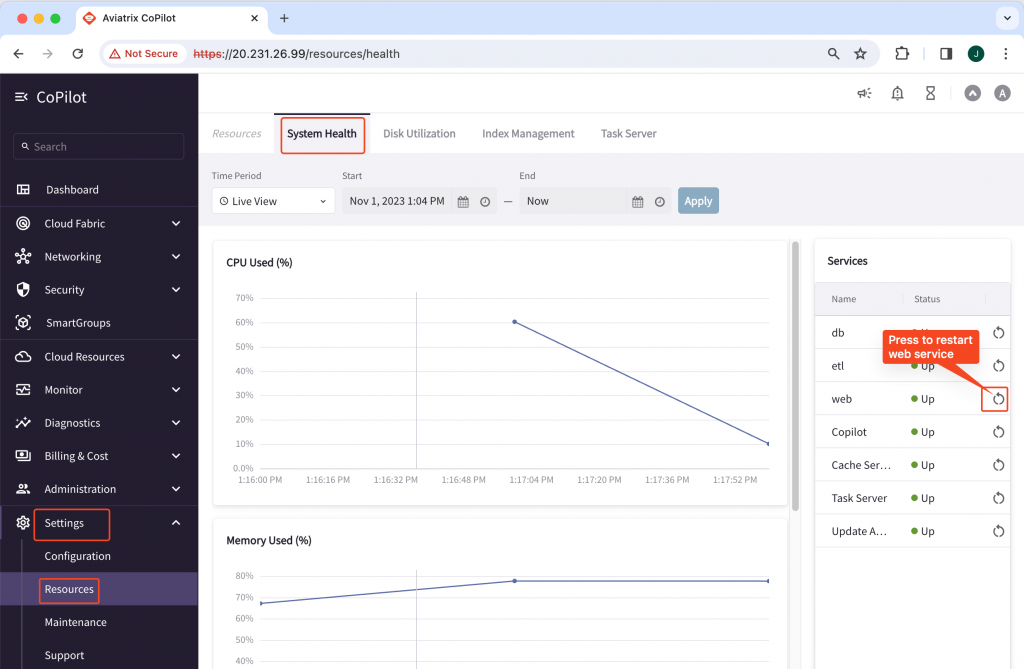
Restart CoPilot Web Service -> Settings -> Resources -> System health -> Web -> Restart
DNS
Make sure your DNS record is set correctly, e.g.:
avxctrl.cloudlearning365.com would resolve to Aviatrix Controller IP
avxcopilot.cloudlearning365.com would resolve to CoPilot IP
Validation
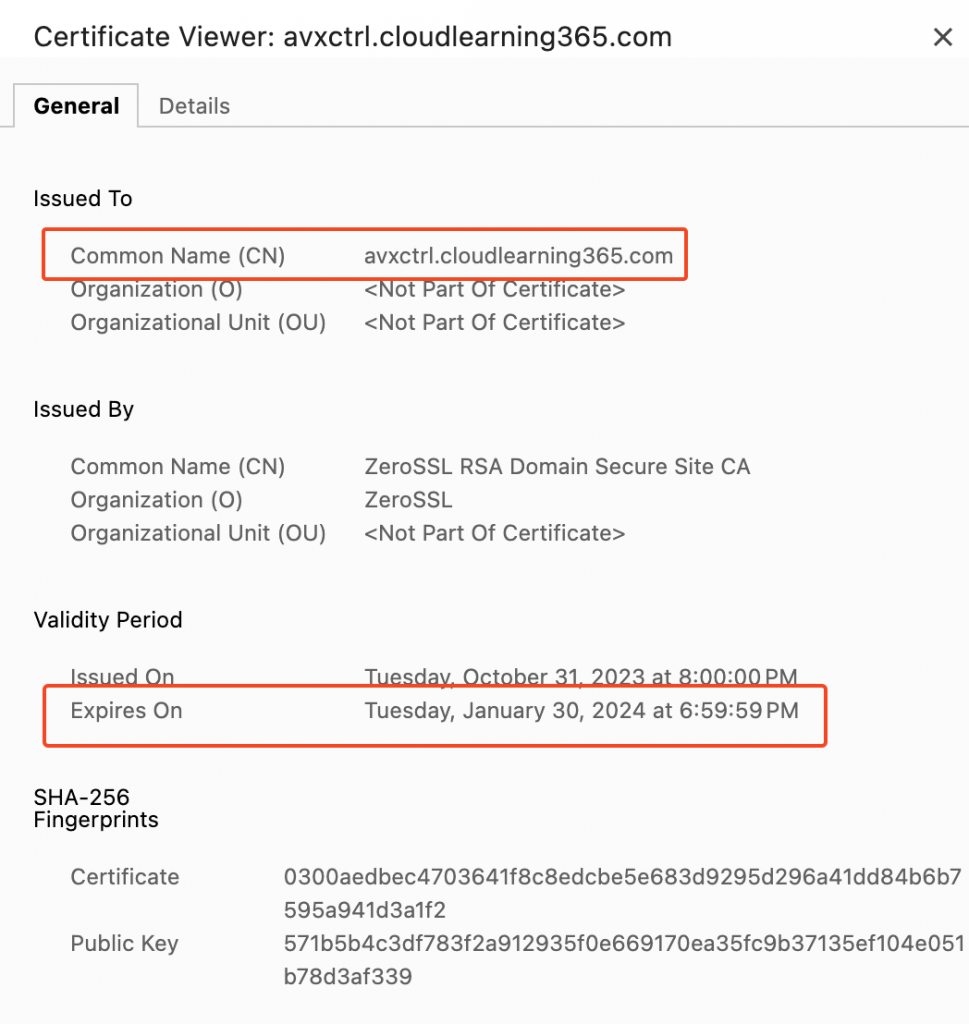
In the browser, try to open https://avxctrl.cloudlearning365.com, e.g. in Chrome, there’s no warning, and then expand on the icon close to the URL, it shows Connection is secure
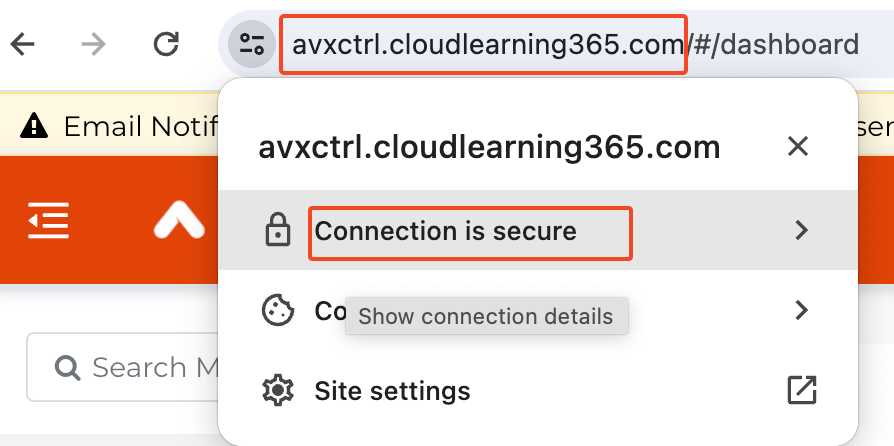
You can further explore the installed certificate by pressing on Connection is secure
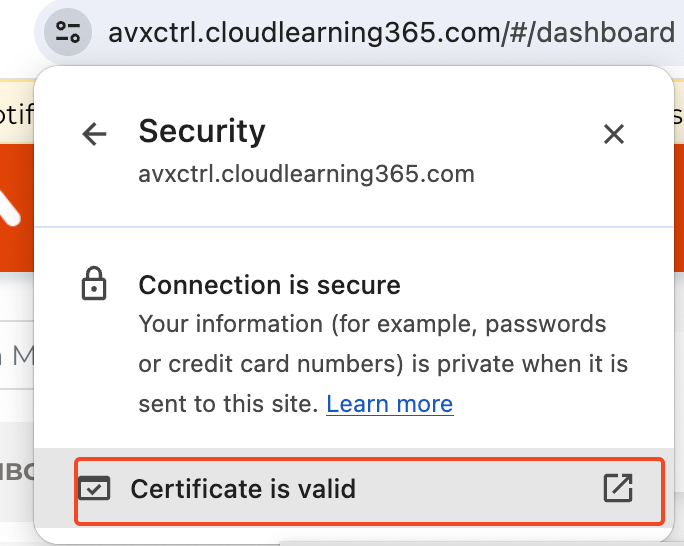
Then click on Certificate is valid, validate on Common Name which should match your URL FQDN (Fully Qualified Domain Name), and Expires on should be a future date.