Aviatrix controller is already hardened. You may further lock it down with Settings -> Controller -> Access Security -> Controller Security Group Management. The controller would be protected by Security Group allowing access only from Aviatrix Gateways. Customer can add their own egress public IPs and CoPilot public IPs to security group, allowing inbound HTTPs access to the Aviatrix controller.
Enterprises already utilizing Azure Application Gateway/ WAF may want to place the Aviatrix controller behind it, for tighter security. This blog post shows how to place the Aviatrix controller behind Azure Application Gateway/WAF
Before continue on, you need to make sure:
- Already own your domain name, such as mydomain.com
- Already requested SSL certificate for aviatrix controller, such as avx.domain.com, refer to my previous blog post
- Assigned full-chain cert to the aviatrix controller as Server Public Certificate section, refer to this post , and this post (note, Application gateway doesn’t support self-signed certificate as backend)
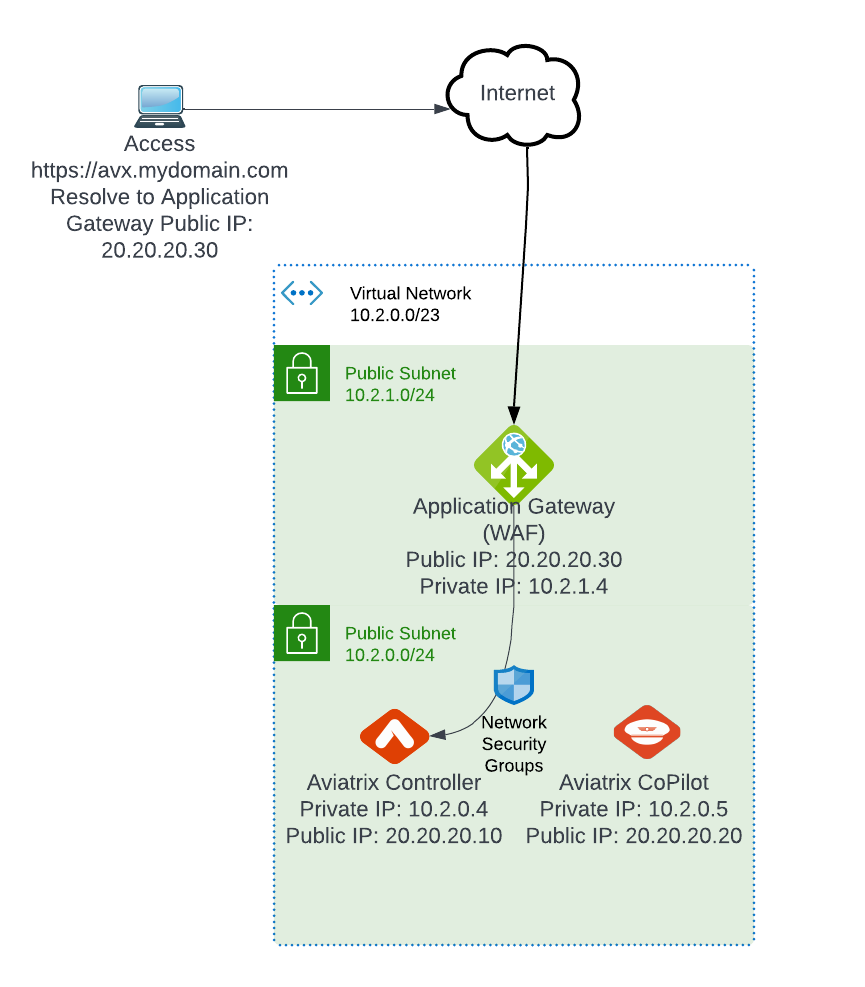
- In your domain DNS, avx.domain.com is set to point to the Aviatrix controller’s public IP, eg: 20.20.20.10 as shown above
- Tested that https://avx.mydomain.com works as desired
Let’s get started:
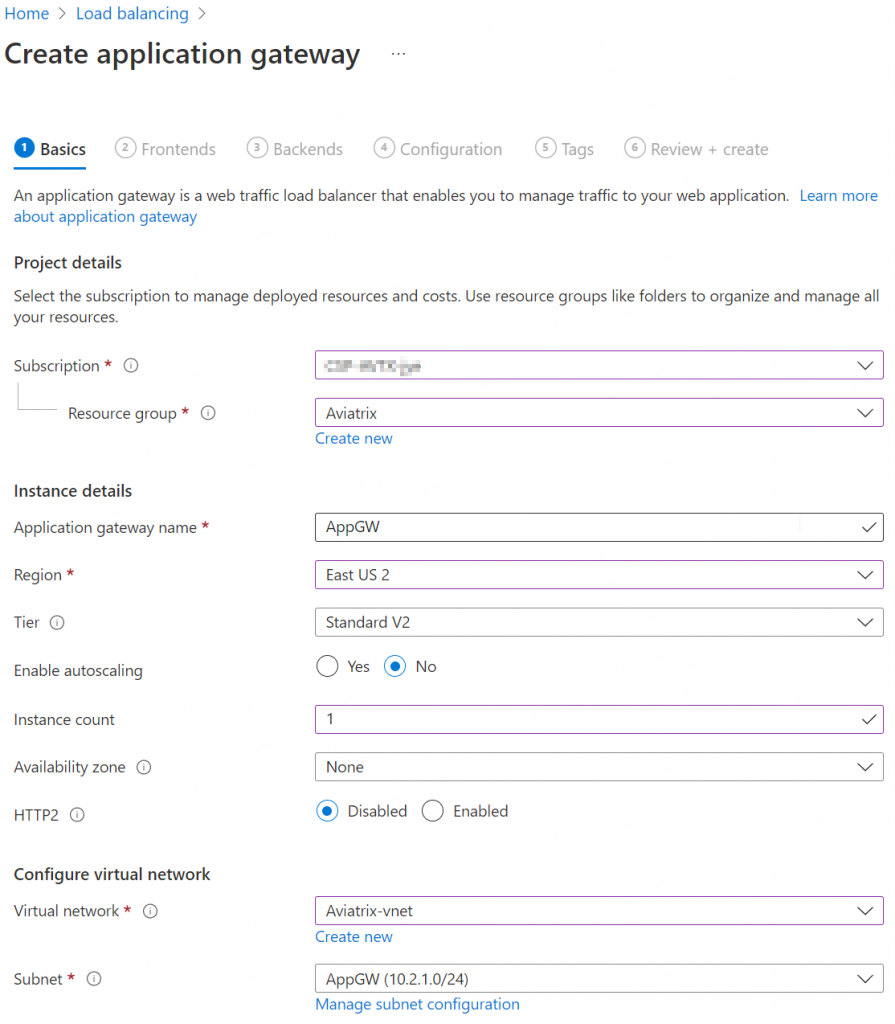
- Application gateway require it’s own subnet, this article recommended /24 subnet, create such subnet in the same vNet where Aviatrix Controller and CoPilot resides.
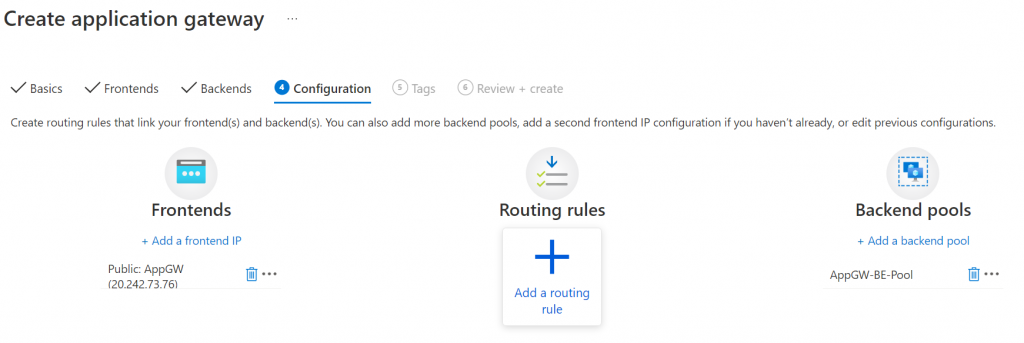
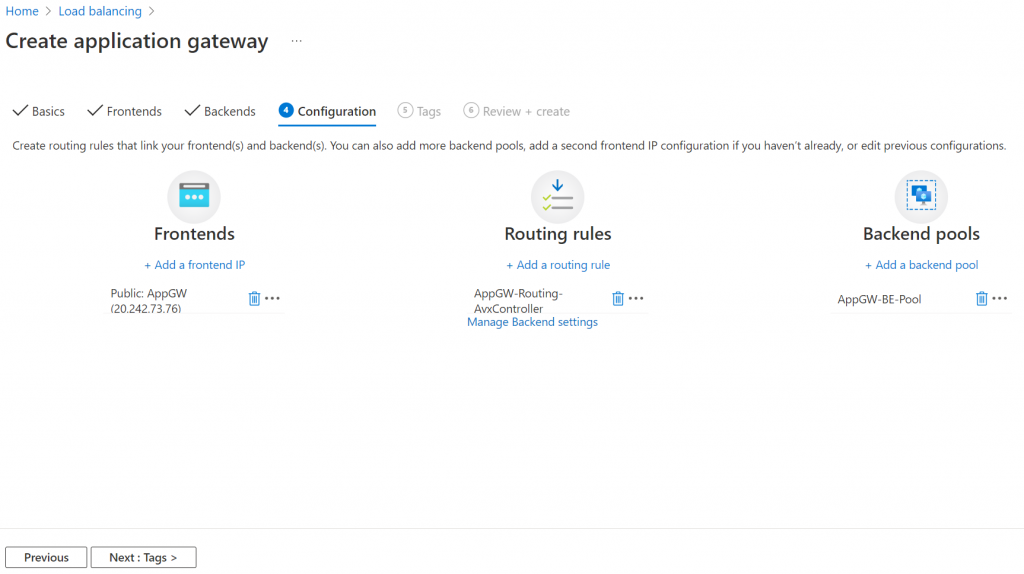
- Fill in basic information to create application gateway
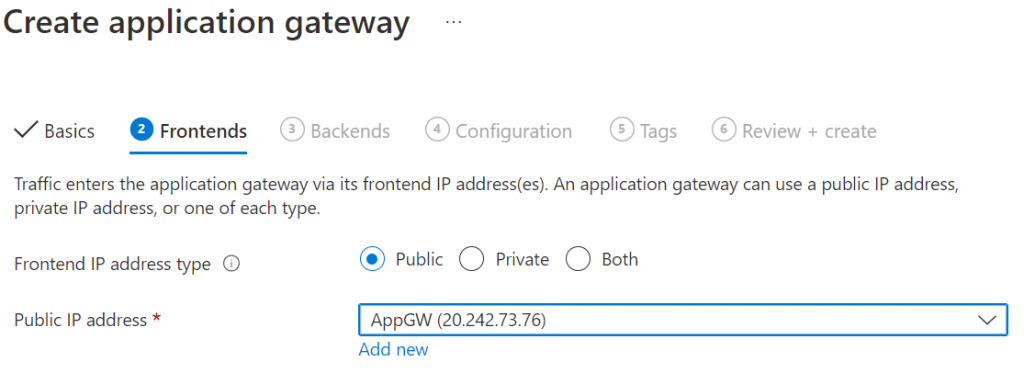
3. Add or use existing public IP for frontends
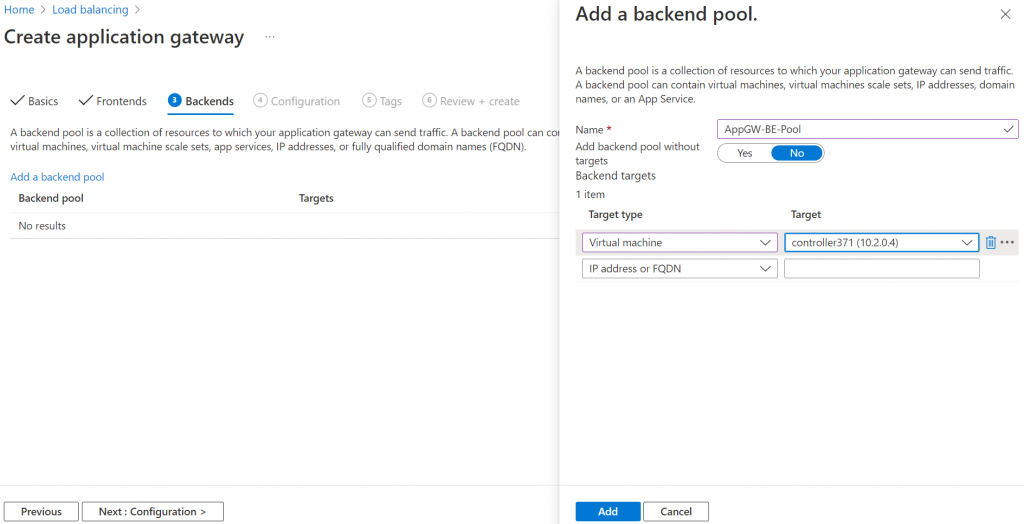
4. Add the Aviatrix Controller as backend pool
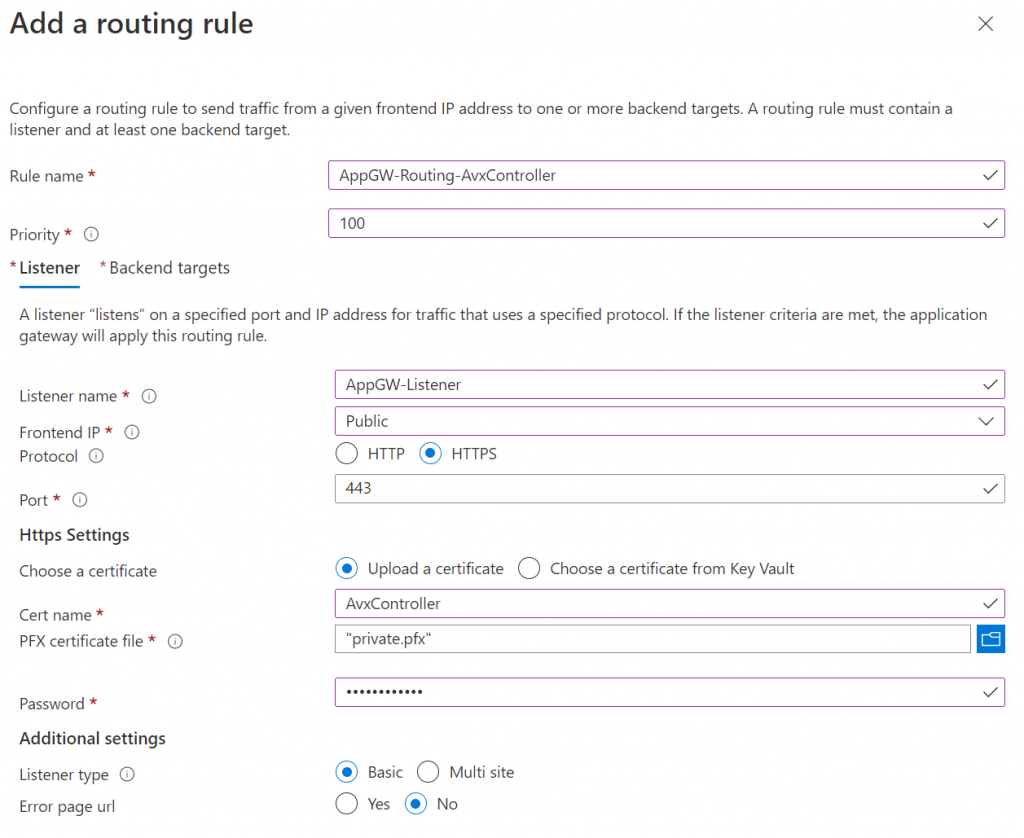
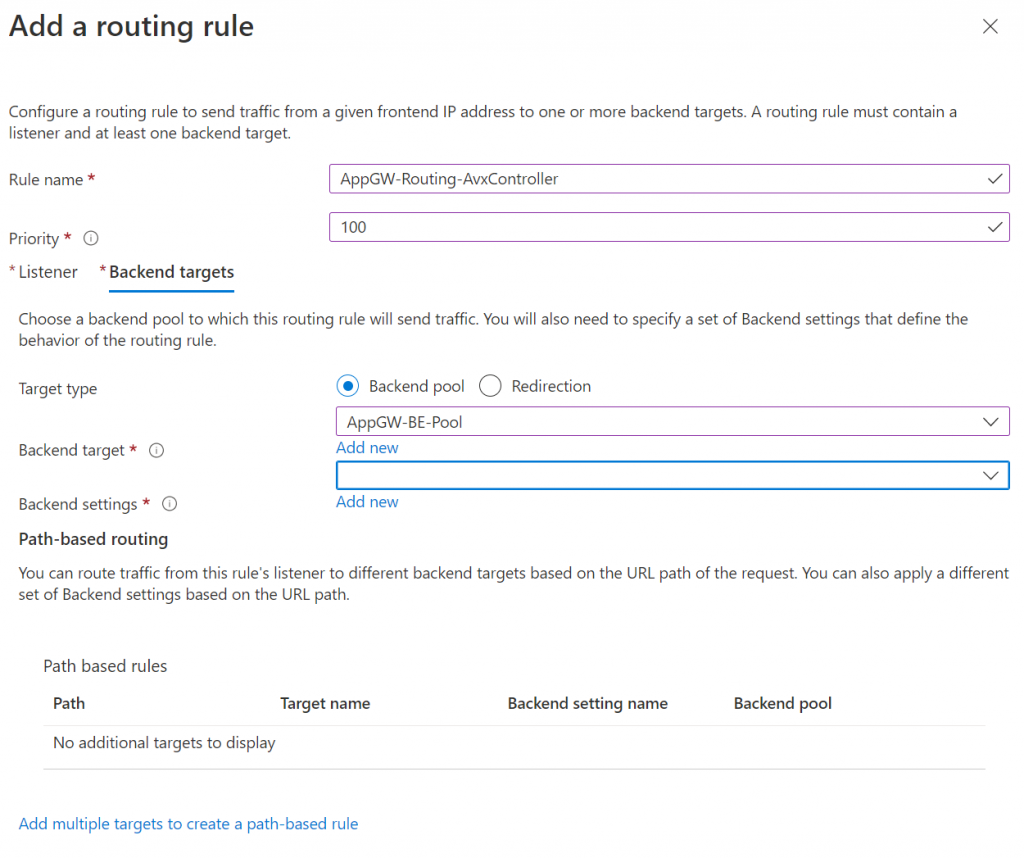
5. Add routing rules
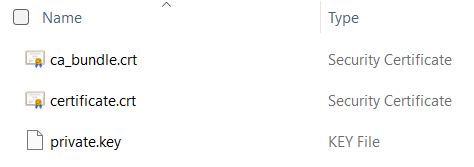
6. Application gateway requires PFX certificate file for the SSL listener , in my previous post of obtaining SSL for Aviatrix controller, I’m using ZeroSSL to obtain SSL certificate. this article show how to create a PFX certificate from the three files issued by ZeroSSL:
On MacOS or Linux:
cat certificate.crt ca_bundle.crt > full_chain.crt
openssl pkcs12 -export -out certificate.p12 -inkey private.key -in full_chain.crt
On Windows:
copy /b certificate.crt + ca_bundle.crt full_chain.crt
openssl pkcs12 -export -out certificate.p12 -inkey private.key -in full_chain.crtNote: There is a PowerShell module Posh-ACME help you to create all these certificates from an ACME capable certificate authority such as Let’s Encrypt.
Once obtained the PFX certificate, provide it and password through the listener workflow:
In the Backend targets tab, pick backend pool from drop down, then Add new for Backend settings
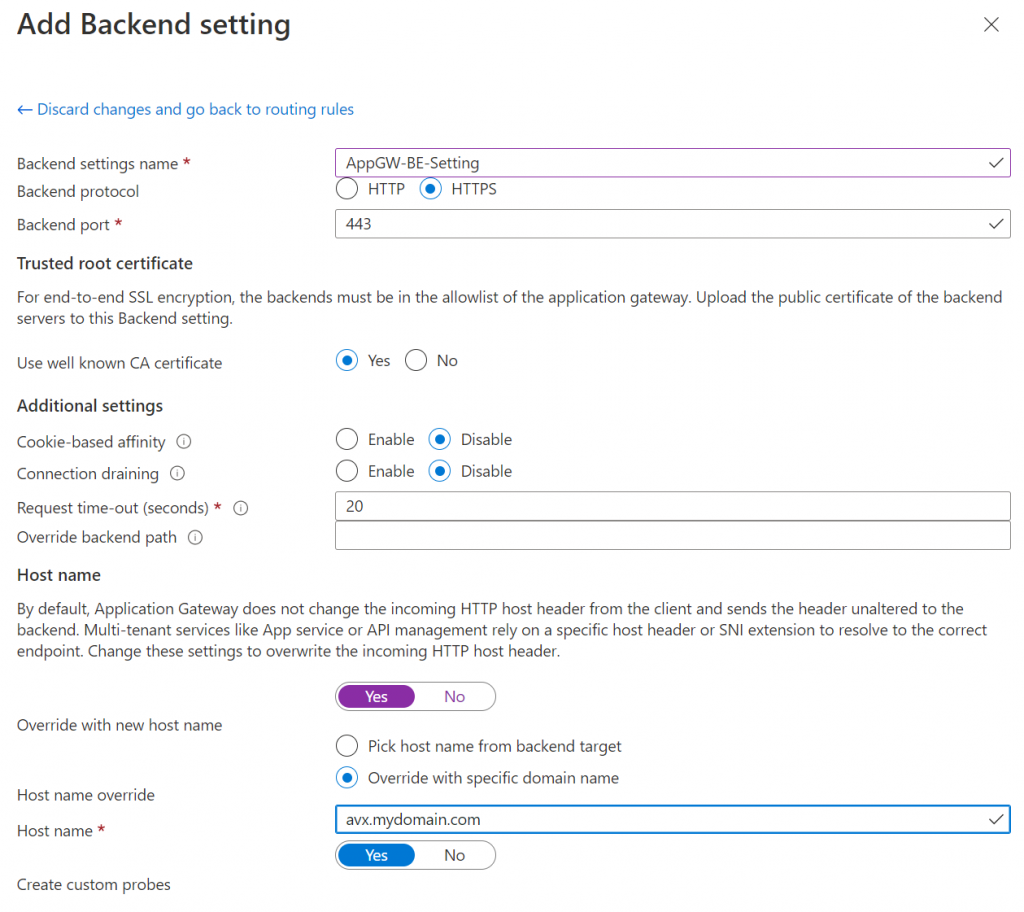
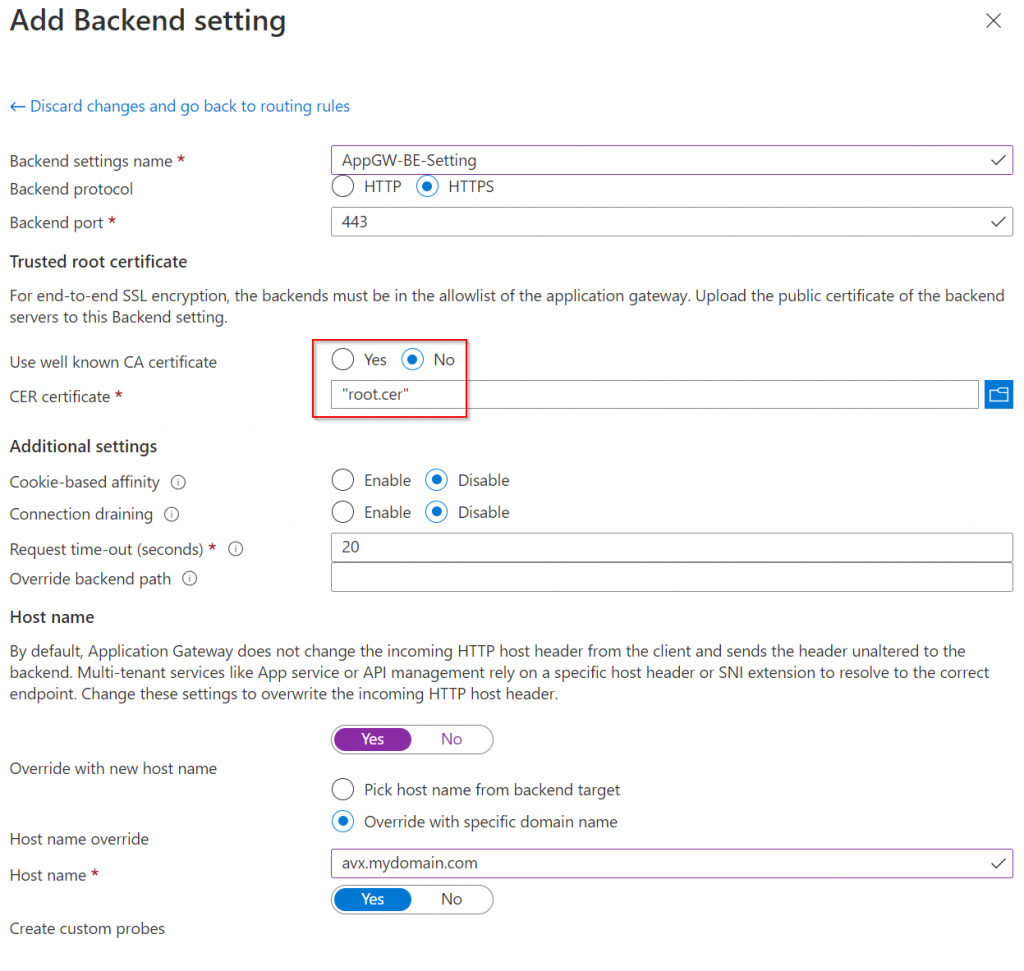
In Add Backend setting section, pick HTTPS as backend protocol (assuming your Aviatrix Controller already listen on HTTPS and already using Full-Chain certificate as server public cert.
One thing to note, if you obtained a certificate from a well known CA (Certificate Authority), then you can pick Yes in Use well known CA certificate,
If you are not using a well known CA issued certificate such as your Enterprise CA, you will need to provide Base-64 encoded X.509 (.CER) of the root CA cert. The following example shows extracting the root CA cert using a Windows client with Chrome browser:
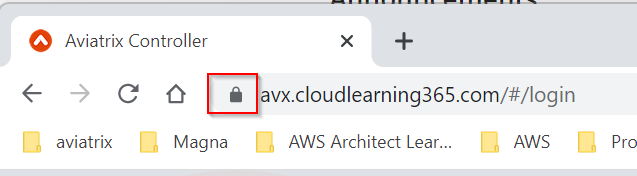
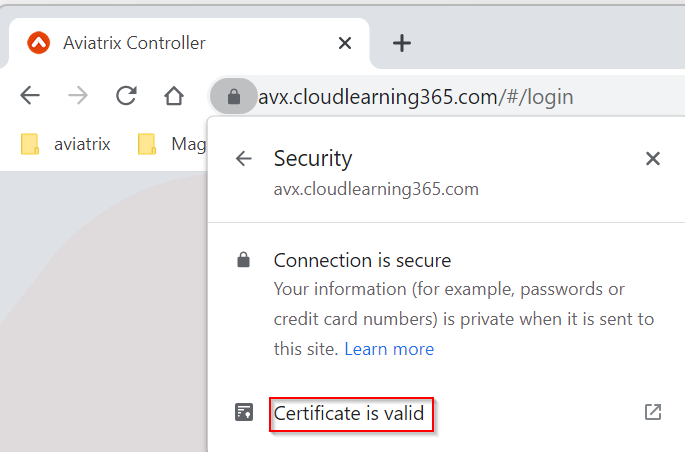
Visit your SSL enabled Aviatrix controller, then click on the pad lock
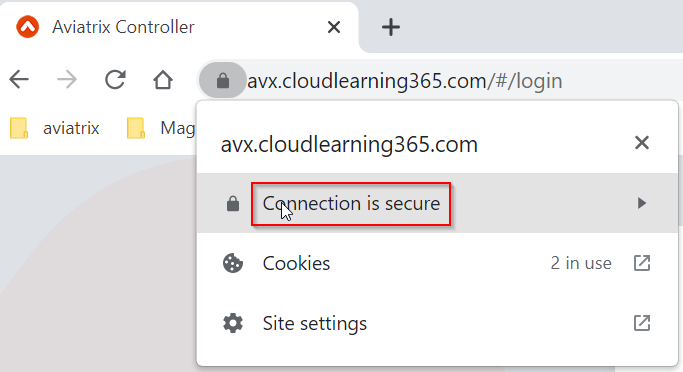
Click and expand Connection is secure
Click on Certificate is valid
This opens up the server certificate
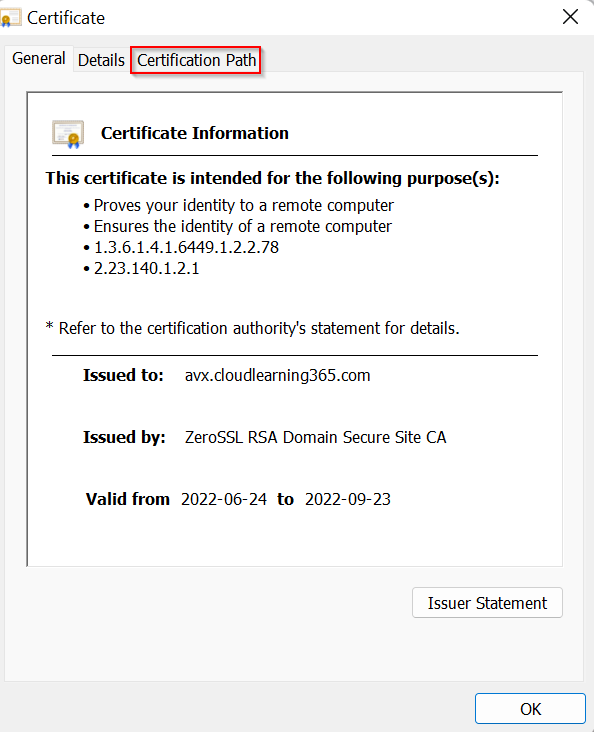
Click on Certificate Path tab, certificate is ordered as:
- Root Certificate Authority
- Intermediate Certificate Authority
- Server Certificate
- Intermediate Certificate Authority
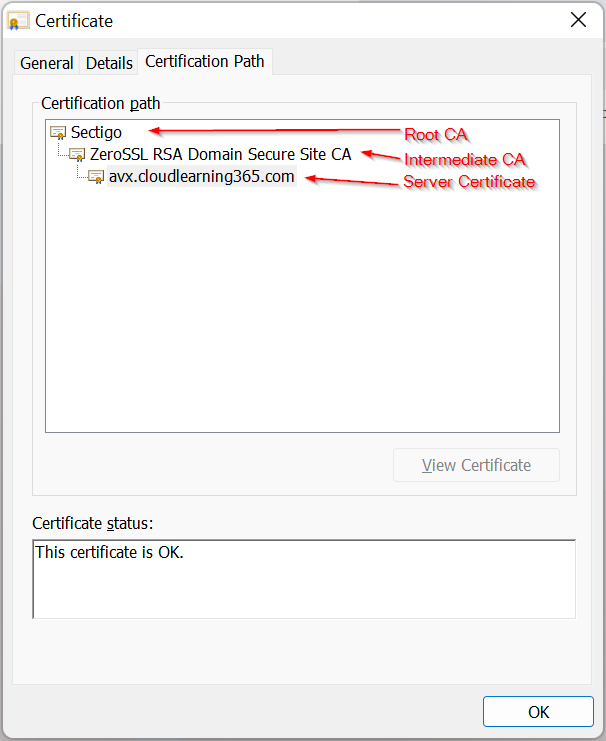
Since we need the root CA, we need to double click on Sectigo in this example
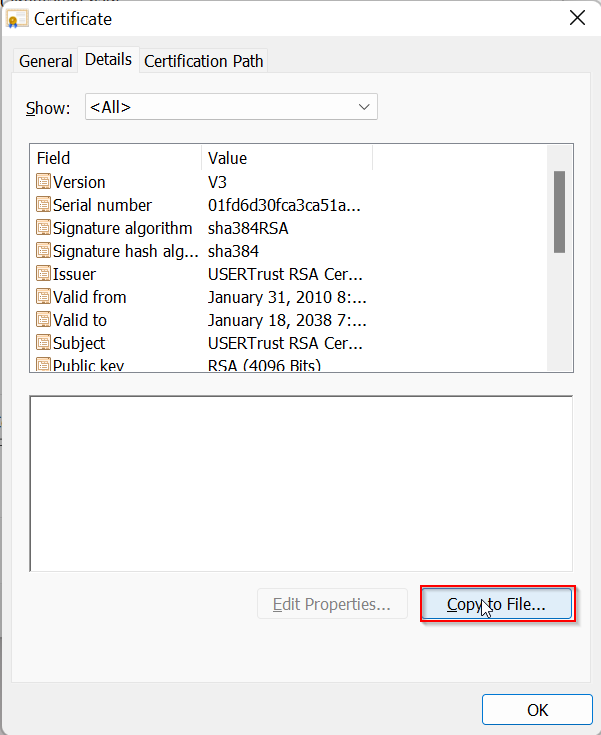
Notice in General tab, issued to and issued by are the same. Root CA is a self signed certificate. Then click on Details tab
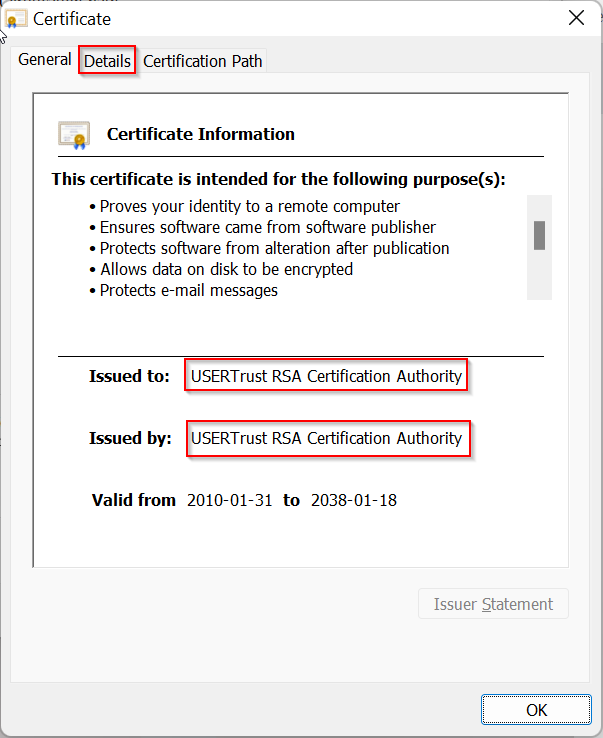
Click on Copy to File…
Click on Next, then choose Base-64 encoded X.509.
This article is an interesting read about the difference of certificate formats.
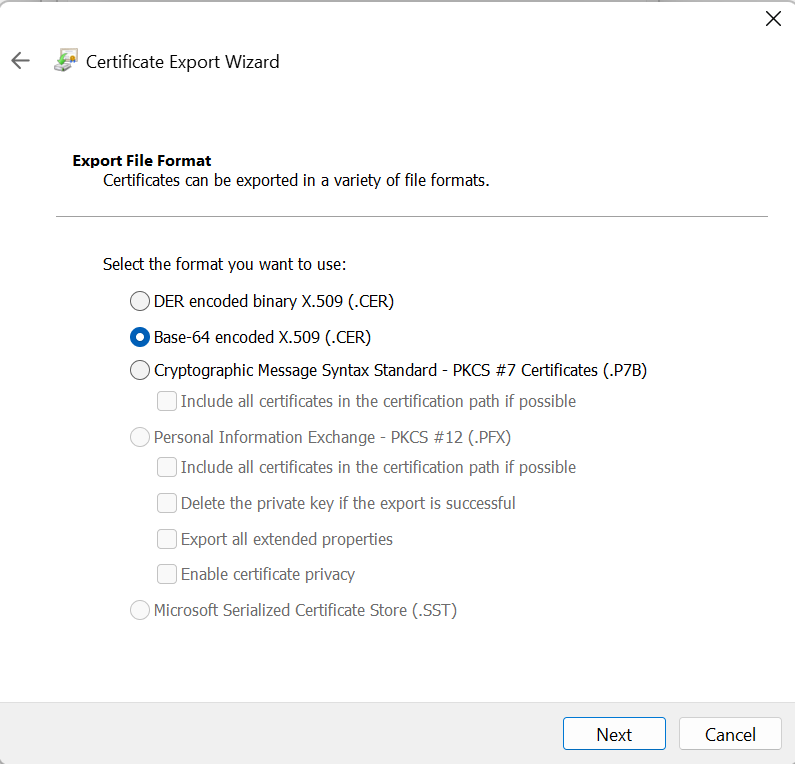
Save the file as root.cer, goes back to Add Backend setting for Application Gateway, choose No for Use well known CA certificate, and upload root.cer
This brings back to Add a routing rule workflow, and the Backend settings is now complete, click on Add on bottom of the page
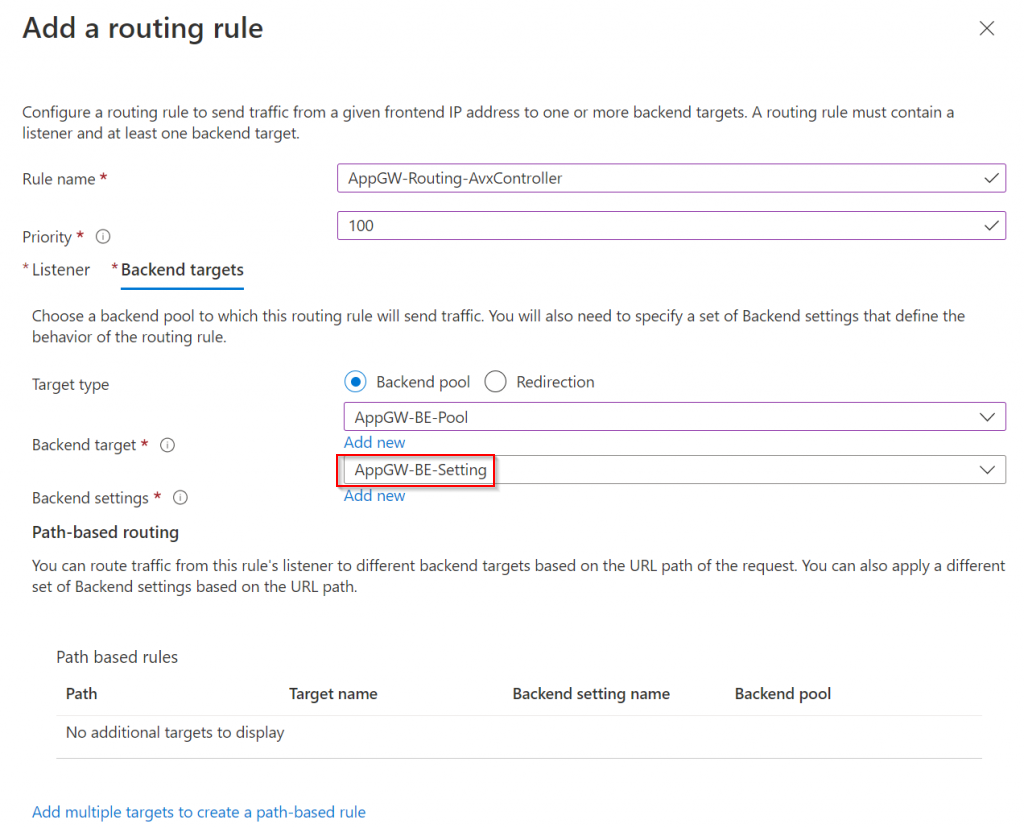
Click on Next: Tags -> Next: Review + Create -> Create
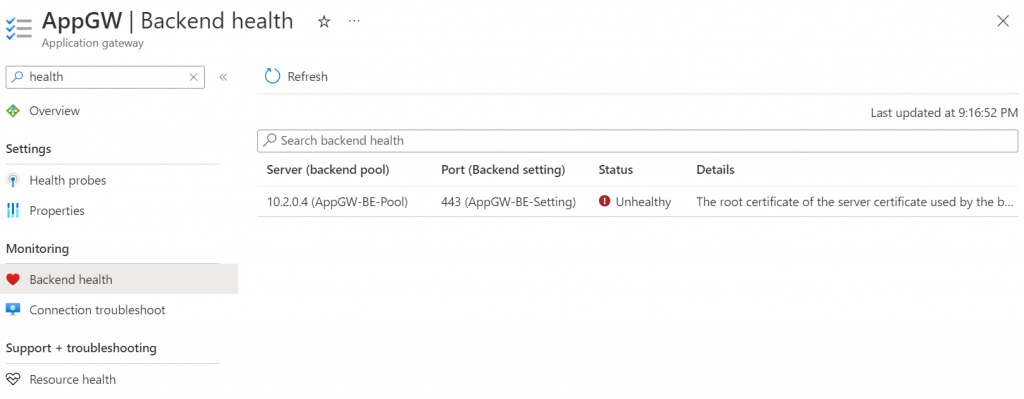
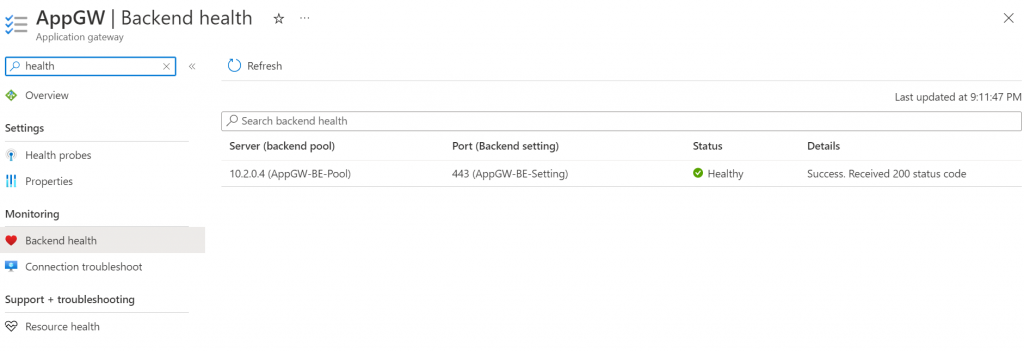
If everything goes well, check Application Gateway -> Backend Health, you should see Status healthy
You may change your Windows Client c:\windows\system32\drivers\etc\hosts file to have avx.mydomain.com map to Application Gateway’s public IP. Then reopen browser window try to access https://avx.mydomain.com
If this is successful:
- Update your DNS hosting record, so avx.mydomain.com will map to Application Gateway’s public IP, instead of Aviatrix Controller’s public IP
- Enable WAF in detection mode, and gradually enable rules that won’t break Aviatrix Controller’s function
- Further lock down aviatrix controller’s network security group by removing your egress public IPs.
Common error, when Aviatrix controller server certificate doesn’t contain full-chain (need both Intermediate CA and Server Certificate)
The root certificate of the server certificate used by the backend does not match the trusted root certificate added to the application gateway. Ensure that you add the correct root certificate to whitelist the backend